AI Automation and Agents: A Step-by-Step Beginner Workflow
Build a beginner AI automation or agent workflow with one clear task, scoped tool access, human approval, WordPress REST boundaries, testing, and rollback.


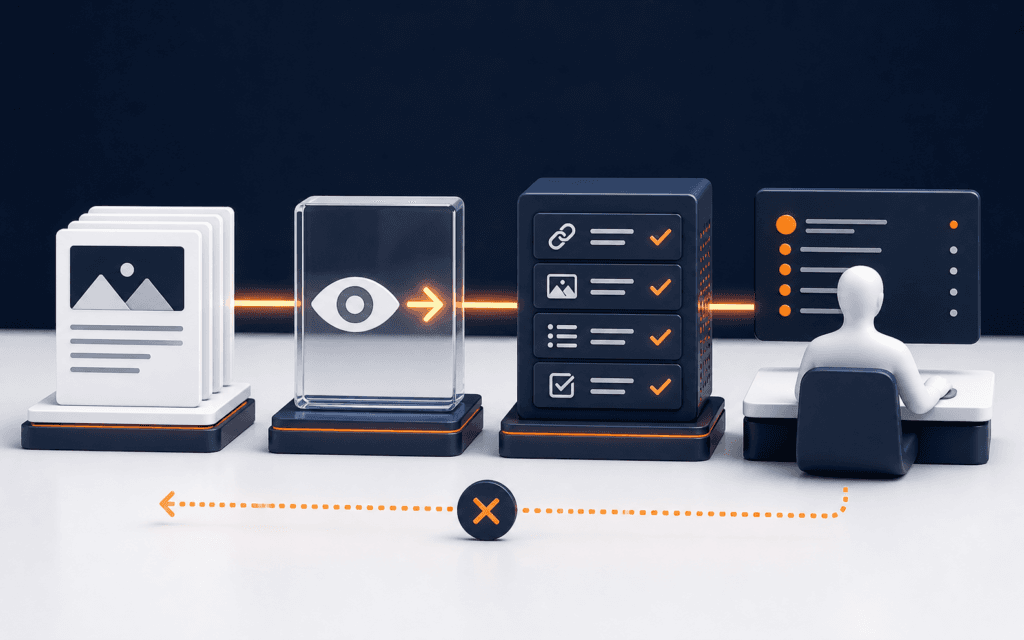
To build a beginner AI automation or agent workflow, start with one narrow task, decide what the AI is allowed to read, define the tools it may use, add a human approval point, then test the workflow with safe examples before connecting it to a real system. A simple automation follows fixed steps. An agent-style workflow can decide which approved tool to use, but it still needs scope, permissions, logs, and review.
For a first project, do not let an AI publish content, change customer data, or update a website without approval. A safer beginner workflow is a WordPress content assistant that reviews a draft brief, suggests edits, prepares a proposed update, and waits for a person to approve the change.
Direct answer: build a reviewed workflow before an autonomous one
The safest first AI automation and agents step-by-step tutorial is not “make an agent do everything.” It is a controlled workflow with a clear input, a useful AI decision, one or two approved actions, and a visible review checkpoint.
The OpenAI Agents SDK documentation describes agents as applications that can plan, call tools, collaborate across specialists, and keep enough state for multi-step work. That is more flexible than a simple automation, but flexibility also increases the need for boundaries. The OpenAI function calling guide explains the core idea behind many tool-using systems: the application defines functions or tools, and the model can request those tools through structured inputs.
For beginners, the practical lesson is simple. The AI should not receive unlimited access. It should receive a task, a few allowed tools, and clear rules for when to stop and ask for human approval.
| Workflow type | How it behaves | Beginner safety rule |
|---|---|---|
| Simple automation | Runs fixed steps when a trigger happens | Use it for predictable actions |
| Agent-style workflow | Chooses among approved tools based on the task | Limit tools and require review before write actions |
| Autonomous workflow | Acts with little human interruption | Avoid this as a first project |
Step 1: choose one task with a real boundary
Start with a task that can be checked. “Manage my website” is too broad. “Review a draft WordPress update and prepare a suggested revision for approval” is better. The workflow has a clear input, output, and review point.
Write the task in one sentence:
- The user provides a draft content brief.
- The AI checks clarity, missing details, and tone.
- The workflow proposes a revised title, excerpt, and update notes.
- A person approves, edits, or rejects the proposed update.
- Only approved work moves toward WordPress.
This task is useful because it teaches agent thinking without handing over risky control. The workflow can reason about a brief, but it cannot publish by itself.
Step 2: define what the agent can read and what it can do
An agent’s environment is everything it can access. The n8n AI Agent node documentation describes an AI agent as a system that can use external tools and APIs, then choose tools depending on the task. That is powerful, but every tool is also a permission decision.
For the WordPress example, split access into read, prepare, and write:
- Read: The workflow may read the submitted brief, the existing page title, and the approved style rules.
- Prepare: The workflow may draft a proposed title, excerpt, and change summary.
- Write: The workflow may not update WordPress until a person approves the proposed change.
This separation keeps the first project realistic. It also gives you a clean test plan. If the AI invents a fact, produces weak copy, or misunderstands the page goal, the human approval step catches the issue before the website changes.
Step 3: choose tools only after the workflow is clear
Beginners often choose tools before defining the workflow. Reverse the order. First decide the task, input, output, approval point, and failure cases. Then choose the tool layer.
If you are coding, function calling can connect a model to tools that your application defines. A function might fetch a draft, validate required fields, create a proposed update, or save an approval record. If you use an automation platform, the same design principle applies: the agent should only see the actions it genuinely needs.
Zapier’s current agent documentation says agents can use actions from its app library to automate tasks. That does not mean every action should be enabled. Start with the least powerful action that solves the current workflow. For a beginner content workflow, read-only or draft-preparation actions are safer than direct publishing actions.
Step 4: build the reviewed WordPress content workflow
Here is a practical beginner version that connects AI automation and agents to a WordPress-related task without removing human control.
1. Collect a structured brief
Ask the user for page type, target reader, main message, required facts, links to preserve, and what should not change. A structured brief gives the AI useful constraints. It also reduces the chance that the AI fills gaps with guesses.
2. Ask the AI to diagnose before rewriting
The first AI step should not be “rewrite this.” Ask it to identify missing information, unclear claims, tone mismatch, and risk. This forces the workflow to show its reasoning in a reviewable way.
3. Prepare a proposed update
After the diagnosis, the workflow can suggest a title, excerpt, short body change, or checklist. Keep the output small. Beginners learn more from one well-reviewed change than from a large generated page that nobody can verify.
4. Add a human approval state
The approval state should have at least three options: approve, edit, or reject. If the user rejects the output, the workflow should record the reason. If the user edits the output, the edited version should be the version that moves forward.
5. Connect WordPress only at the approved boundary
The WordPress REST API handbook explains that WordPress exposes an interface for interacting with WordPress data. For write actions, authentication matters. WordPress documentation on REST API authentication describes application passwords as one supported method for authenticated REST use. In a beginner workflow, credentials should never be placed in prompts, screenshots, shared documents, or client-side code.
For the first version, you can stop before the write step and simply export an approved change note. If you later connect a real WordPress update, keep it draft-first, log the post ID, and verify the result after the write.
Step 5: test the workflow before using real content
Testing is not optional. Use safe sample briefs first. Test a complete brief, an empty brief, a brief with unsupported claims, a request that asks for direct publishing, and a request that includes private information. The expected behavior should be written before the test.
For example:
- Empty brief: the workflow asks for required details.
- Unsupported claim: the workflow flags the claim and asks for evidence.
- Direct publish request: the workflow refuses and routes to human approval.
- Private information: the workflow warns that sensitive data should be removed.
- Valid brief: the workflow prepares a proposed update and waits.
A beginner agent workflow is successful when it behaves safely in boring cases. Do not judge it only by a polished demo.
Common mistakes to avoid
- Giving the agent too many tools: More tools create more failure paths. Start with one useful read or draft-preparation action.
- Skipping approval: Human review is the difference between a learning workflow and risky automation.
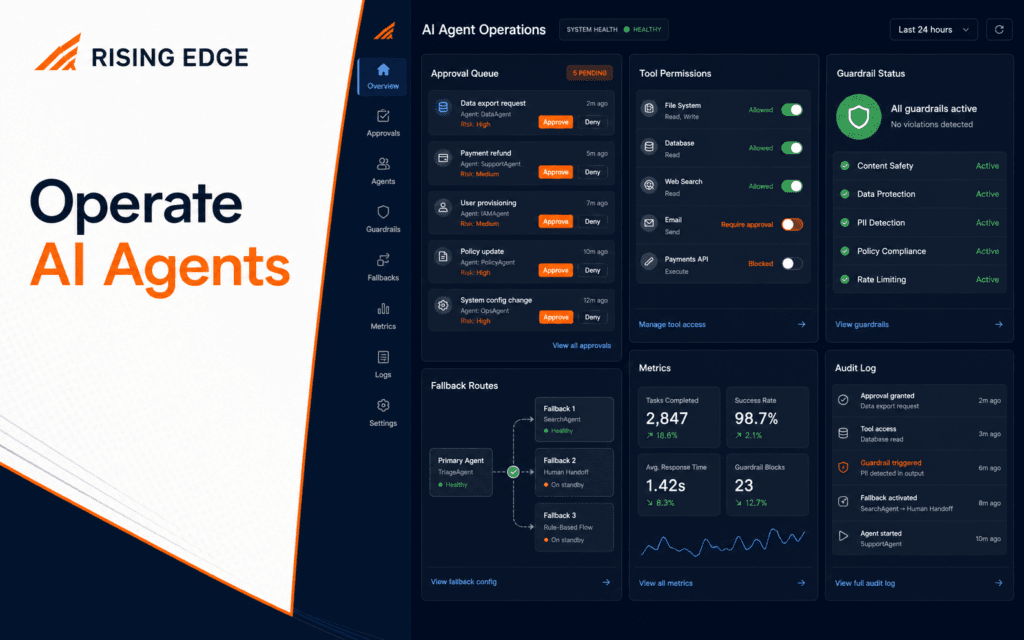
- Hiding logs: Keep a compact record of input, decision, tool requested, approval status, and final result.
- Using real credentials in prompts: Credentials belong in secure environment variables or platform connections, never in instructions sent to a model.
- Treating a generated draft as verified: AI output still needs fact checking, link checking, and editorial review.
- Repeating the first automation article: This workflow is about tool access, approval, and agent boundaries, not only a generic first automation.
Where WordPress Development fits
WordPress is a useful example because content changes have visible consequences. A draft title, excerpt, or page update can affect readers, SEO, and brand trust. That makes it a good place to learn approval gates.
If your goal is to understand the website side more deeply, Rising Edge’s WordPress Development course is the natural supporting route. If your goal is to build broader agent systems, AI Automation and Agent Development is the more direct next step. Use the course that matches the bottleneck your project reveals.
Final checklist before you build
Before you connect an agent workflow to any real system, answer these questions:
- What exact task is the workflow allowed to perform?
- What data can it read?
- Which tools or actions can it request?
- Which actions require human approval?
- Where are credentials stored?
- What gets logged?
- How do you reverse or reject a bad output?
If you cannot answer those questions, the workflow is not ready for real content. Start with a simulated version, test the approval path, then connect tools one at a time.
Are AI agents different from automations?
Yes. A simple automation usually follows fixed steps. An agent-style workflow can choose among approved tools based on the task, which makes scope, permissions, logging, and human review more important.
Should a beginner let an AI agent publish WordPress content automatically?
No. A beginner workflow should prepare a proposed update and wait for human approval. Direct publishing can come later only after testing, permissions, rollback, and verification are reliable.
For a learner comparing classroom training in Gujrat, Punjab, Pakistan, this workflow turns interest in the AI Automation and Agent Development into concrete evaluation criteria. It clarifies which decisions and checks should appear in credible practical work.
Want to Build Practical Technology Skills?
Explore RisingEdge courses designed to help students learn real skills, build projects, and prepare for career opportunities.