Technical Interview Project Walkthrough: Decisions, Tradeoffs, Proof
A strong technical interview project walkthrough is a short evidence-based explanation, not a tour of every screen or dependency. Present the user problem, constraints, your.

A strong technical interview project walkthrough is a short evidence-based explanation, not a tour of every screen or dependency. Present the user problem, constraints, your responsibility, the main technical decision, one difficult failure, the verification method, the result, and the next improvement in a sequence the interviewer can follow.
To make a justified choice about what to present, compare candidate projects by relevance, personal ownership, explainable depth, completion, and available evidence. Then prepare a ten-minute core version and supporting details for follow-up questions. Use real artifacts such as a repository, diagram, test, issue note, deployment record, or case study. State team contributions accurately, label sample data, and separate measured outcomes from estimates or intentions.
Choose A Project With Explainable Depth
Select one project you understand from problem definition through verification. It does not need the largest feature set. It needs enough depth to discuss requirements, architecture, data, errors, testing, deployment, and limitations at the level relevant to your role.
Prefer a finished project with inspectable evidence. A smaller application that runs, handles expected failures, and has clear documentation gives you more defensible material than an ambitious prototype with missing paths. Use the selection criteria in Technology Portfolio Projects: Scope, Evidence, Finish when deciding what to present.
Match the project to the interview. O*NET’s web developer profile includes responsibilities across interfaces, application code, compatibility, performance, infrastructure, and integrations. Emphasize the parts that demonstrate the responsibilities named in the role rather than forcing every possible topic into one story.
Open With The Problem And Outcome
Begin with two or three sentences: who had the problem, what they needed to accomplish, what you built, and whether the project is a learning exercise, client project, team assignment, or production system. This context makes every later technical detail easier to judge.
Describe the outcome without inflated claims. A valid outcome might be a deployed workflow, a reduced number of manual steps in a controlled test, or successful completion of defined scenarios. Do not turn sample analytics, hypothetical revenue, or a design target into a measured business result.
Name the key constraint early. Time, available data, privacy, budget, browser support, hosting, team experience, and required technology can explain why a reasonable solution differs from an ideal one. Constraints show judgment when they are specific and connected to a decision.
Separate Team Work From Your Contribution
State the team composition and your responsibility. Use precise verbs such as designed, implemented, reviewed, tested, documented, or deployed. Avoid saying ‘we built everything’ when the interviewer needs to understand which decisions and artifacts you can defend personally.
For shared work, identify the boundary you owned and one collaboration point. You might have implemented the form workflow while another member designed the visual system, then worked together on validation feedback. This shows both contribution and coordination without taking credit for someone else’s work.
Prepare evidence for your contribution, such as commits, issue assignments, design notes, test cases, or review comments. Evidence is not a performance. It is a way to keep the explanation accurate if the interviewer asks for detail.
Draw One Architecture View
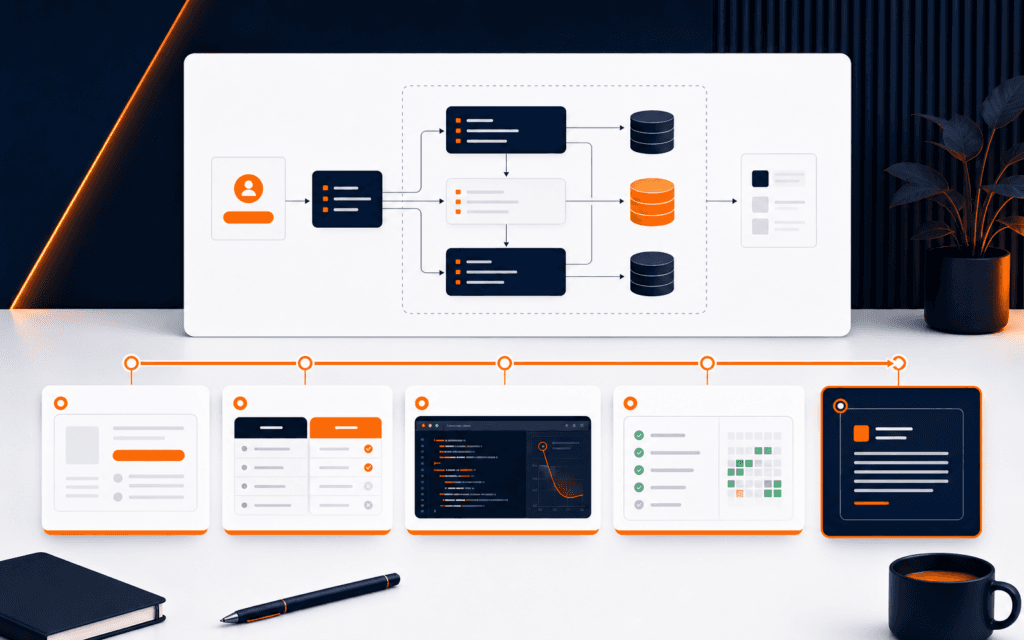
Use one simple diagram showing the user, interface, server or platform, data store, and significant external service. Include only components needed to explain the main workflow. A dense infrastructure map wastes time if the interview is about a small application decision.
Walk through one request or user action from start to finish. Explain where data enters, where it is validated, how authorization is considered, what changes state, and how the user receives success or failure feedback. Name trust boundaries without exposing secrets or private system details.
Be ready to explain what you intentionally omitted. A project may avoid background jobs, complex permissions, caching, or a microservice split because its scale and requirements did not justify them. A clear omission with a trigger for reconsideration is a useful tradeoff.
Explain The Main Decision And Alternatives
Choose one decision that materially affected the project. Examples include data modeling, server rendering versus client fetching, a managed platform versus custom code, validation placement, or the structure of a reusable component. State the decision as a question before giving the answer.
Describe at least two plausible options and the criteria used to compare them. Useful criteria include implementation time, team familiarity, maintainability, accessibility, failure behavior, operating cost, data sensitivity, and expected usage. Avoid claiming one technology is universally best.
Then state the tradeoff you accepted. A managed service may reduce operational work while increasing dependency. A simpler data model may speed delivery while limiting a future workflow. Interviewers often learn more from a recognized cost than from a list of benefits.
Tell One Debugging Story
Prepare one failure that required investigation. Use a compact sequence: symptom, reproduction, first evidence, rejected hypothesis, root cause, correction, and verification. The story should show how information changed your next action rather than presenting random attempts as persistence.
Include the tools only where they mattered. Browser network data, server logs, a debugger, a database query, a focused test, or Git history can each narrow a problem. Explain what the tool revealed and why that evidence ruled an option in or out.
Acknowledge when the initial assumption was wrong. Correcting a hypothesis after evidence is stronger engineering behavior than pretending the answer was obvious. Remove credentials, customer data, and internal identifiers from any artifact used in the interview.
Show How You Verified The Work
Connect verification to risks. For a form, test valid data, missing data, invalid formats, server rejection, keyboard operation, and network failure. For a data workflow, check authorization, constraints, duplicate actions, and recovery. Name the scenarios instead of saying that you tested everything.
Distinguish automated tests, manual checks, code review, and monitoring. Each provides different evidence. Report only checks you actually ran. If coverage was limited, state the limitation and the next test that would provide the most value.
Show the final state with a small artifact: a test result, issue record, checklist, or deployment verification. The artifact should support the explanation without requiring the interviewer to read an entire repository during the conversation.
Prepare The Repository For Review
Make the selected repository understandable before sharing it. GitHub’s README guidance notes that a README can explain what a project does, why it is useful, how to begin, and where users can get help. Add architecture, decisions, verification, limitations, and safe demo instructions where relevant.
Remove secrets, abandoned files, broken links, and unclear sample data. Confirm that setup instructions work from a clean environment. A public repository should not expose production credentials, private logs, licensed assets without permission, or personal data.
Curate the profile around a few projects you can explain. GitHub supports pinning selected repositories, which can help reviewers find relevant work quickly. Selection matters more than displaying every experiment.
Build A Ten Minute Sequence
Allocate roughly one minute to context, one to your role, two to architecture and workflow, two to the main decision, two to debugging and verification, and one to result and reflection. Keep one minute available for transitions or an early question. Practice the sequence without memorizing a script word for word.
Use at most a few prepared visuals. Open the exact repository, diagram, or demo paths before the interview. Keep a local backup such as screenshots or a PDF in case a public service or network connection fails. Do not spend interview time searching through folders.
Practice stopping after the core answer. An interviewer may want to explore one area rather than hear the entire presentation. A modular sequence lets you answer directly and return to the main story without losing the structure.
Map Likely Follow Up Questions
For each section, write three deeper questions. Why this architecture? What happens under failure? How would the design change for more users? Which security risk mattered? What would you refactor first? What did feedback change? Prepare evidence and limits, not perfect-sounding claims.
When you do not know, separate what you know from how you would investigate. Name the documentation, test, log, or experiment that would reduce uncertainty. Do not invent an API behavior or performance result to fill silence.
A Full Stack Web Development course can provide structured projects and review opportunities for learners building this evidence. The interview preparation still depends on understanding your own decisions and artifacts rather than repeating course terminology.
End With Reflection And Next Steps
Name one lesson that changed how you now approach similar work. It might concern scope, validation, data modeling, testing, documentation, accessibility, or deployment. Explain the behavior you adopted afterward so the lesson is more than a slogan.
Identify the next improvement and the evidence that would justify it. For example, add background processing only if task duration or reliability data shows the need. This demonstrates prioritization instead of presenting the unfinished backlog as a failure.
Finish with a one-sentence summary connecting the project to the target role. Then invite questions. A concise close signals that you can communicate technical work with respect for another person’s time.
For technology learners based in Gujrat, Punjab, Pakistan, the practical approach in this article shows one kind of evidence worth building through the Full Stack Web Development. The focus should remain on defensible decisions and finished work rather than attendance or software familiarity.
FAQ
How long should a technical interview project walkthrough be?
Prepare a ten-minute core version that can be shortened to two minutes or expanded through questions. The interviewer’s format takes priority, so confirm expectations when they are provided.
Should I show code during the walkthrough?
Show a small code section only when it supports a decision, failure, or verification point. A diagram, test, diff, or issue note may communicate the same evidence faster.
What if the project was completed by a team?
Name the team, your responsibility, the boundary you owned, and key collaboration points. Use artifacts to support your contribution and credit other people’s work accurately.
Want to Build Practical Technology Skills?
Explore RisingEdge courses designed to help students learn real skills, build projects, and prepare for career opportunities.